Warning: Bocadillo is now UNMAINTAINED. Users are recommended to migrate to a supported alternative, such as Starlette or FastAPI. Please see #344 for more information.
WebSockets
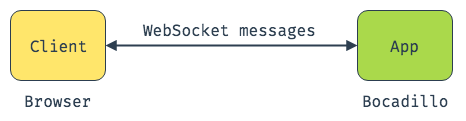
WebSockets allow a web browser and a web server to communicate in a bi-directional way via a long-held, low-latency TCP socket connection. WebSockets are broadly supported, and can be used to build event-driven and real-time features such as notifications, instant messaging, etc.
Bocadillo makes it easy to build WebSocket apps that deal with hundreds or thousands of concurrent connections in real-time.
ALTERNATIVE
You can also use the higher-level socket.io framework in Bocadillo applications. See also Build a real-time application with socket.io.
Prerequisites
Bocadillo comes with the websockets package installed, so you do not need to install extra dependencies. You're ready to go!
If you need an introduction to WebSockets, we recommend Dion Misic's talk A Beginner's Guide to WebSockets (Pycon 2018).
Hello, WebSockets!
Let's learn by example! Here's how simple it is to create an echo WebSocket endpoint:
@app.websocket_route("/echo")
async def echo(ws):
    message = await ws.receive()
    await ws.send(f"You said: {message}")
Just four lines of code!
Note that:
- The route is registered using
@app.websocket_route()instead of@app.route(). - If no message is available yet when calling
.receive(), the view will suspend, allowing the server to process other requests until a message is received.
A vanilla JavaScript client for the endpoint above could be:
const ws = new WebSocket("ws://localhost:8000/echo");

ws.onopen = event => console.log("Connected:", event);
ws.onclose = event => console.log("Connection lost:", event);
ws.onmessage = event => console.log("Received:", JSON.parse(event.data));

setInterval(() => {
  const message = { text: Math.random() > 0.5 ? "ping" : "pong" };
  ws.send(JSON.stringify(message));
  console.log("Sent: ", message);
}, 1000);
How are WebSocket requests processed?
When a client makes a request to your server with the ws:// or wss:// scheme, the following happens:
- The client and the ASGI web server perform a handshake to agree to upgrade the protocol to WebSocket. This is not handled by Bocadillo directly.
- The upgraded request is routed to Bocadillo and a
WebSocketobject is created out of it. - Bocadillo tries to match the requested URL path against a registered WebSocket route. If none is found, the connection is closed with a 403 close code.
- Bocadillo calls the view attached to the route that matched. It must be an asynchronous function accepting the following parameters:
- An instance of
WebSocket. - Keyword arguments representing the extracted route and query parameters.
- An instance of
- If an exception is raised in the process, the connection is closed by following the procedure described in Error handling.
WebSocket views
A WebSocket route maps an URL pattern to a WebSocket view. It is an asynchronous function which takes as input the WebSocket object (named ws by convention) and keyword arguments obtained from route and query parameters.
Besides the modified signature, you can use route parameters and query parameters as well as validation and conversion just like in HTTP endpoints:
@app.websocket_route("/chat/{channel}", value_type="json")
async def chat(ws, channel: str, anonymous: bool = False):
    user = "Anonymous" if anonymous else ws.headers["user"]
    async for message in ws:
        channel_message = {"user": user, "message": message}
        # TODO: send `channel_message` to other clients in the channel…
        await ws.send(channel_message)
Inspecting the connection request
The WebSocket object exposes some of the attributes available on Request objects, namely:
.url: the full URL of the connection request..headers: an immutable, case-insensitive Python dictionary containing HTTP headers..query_parameters: an immutable Python dictionary-like object containing query parameters.
Please see the documentation on Requests for more information on these attributes.
When sessions are enabled, you can also access session data through ws.session.
Receiving messages
You can receive messages from the WebSocket connection using ws.receive():
message = await ws.receive()
By default, the message is returned in plain text. You can customize this by specifying a receive_type:
@app.websocket_route("/chat", receive_type="json")
The possible values for receive_type are: json, text, and bytes.
For convenience, the corresponding methods are available on ws: .receive_json(), .receive_text(), and .receive_bytes().
If you plan to receive a potentially infinite number of messages, you can use the async for syntax to iterate over messages:
@app.websocket_route("/echo")
async def echo(ws: WebSocket):
    async for message in ws:
        # ...
This is simply a shorthand for:
@app.websocket_route("/echo")
async def echo(ws: WebSocket):
    while True:
        message = await ws.receive()
        # ...
Sending messages
To send messages over the WebSocket, use the .send() method:
await ws.send("Hello, WebSockets!")
By default, the message is sent in plain text. You can customize this by specifying a send_type:
@app.websocket_route("/chat", send_type="json")
The possible values for send_type are: json, text, and bytes.
For convenience, the corresponding methods are available on ws: .send_json(), .send_text(), and .send_bytes().
To receive and send messages of the same type, use value_type:
@app.websocket_route("/chat", value_type="json")
This is equivalent to:
@app.websocket_route("/chat", receive_type="json", send_type="json")
Obviously, the value_type must be a valid receive and send type.
Using ASGI events Advanced
It is also possible to receive or send raw ASGI events using the low-level .receive_event() and .send_event() methods.
For example, here's an implemention of an echo endpoint using ASGI events only:
@app.websocket_route("/echo")
async def echo(ws):
    event = await ws.receive_event()
    message = event["text"]
    await ws.send_event(
        {"type": "websocket.send", "text": f"You said: {message}"}
    )
Error handling
Contrary to HTTP routes, Bocadillo does not provide error handling for WebSocket routes.
If an unhandled exception occurs, Bocadillo closes the connection with a 1011 (Internal Error) close code and re-raises the exception for further server-side processing.
Accepting, closing and rejecting connections Advanced
In the standard WebSocket protocol, the server must accept a connection request when it receives one from a client, and close it when the communication ends.
By default, Bocadillo automatically accepts and closes the connection, respectively before and after calling the view. This reduces boilerplate and allows you to focus on receiving and sending messages.
For advanced use cases, you can disable this behavior by passing auto_accept=False to @app.websocket_route(). You then need to call .accept() and .close() manually:
@app.websocket_route("/hello", auto_accept=False)
async def hello(ws):
    print("Going to accept connection…")
    await ws.accept()
    ...
    await ws.close()
    print("Connection closed!")
For convenience, an asynchronous context manager syntax is also available:
@app.websocket_route("/hello", auto_accept=False)
async def hello(ws):
    print("Going to accept connection…")
    async with ws:
        ...
    print("Connection closed normally!")
It is safe to call .close() inside the async with block. However, calling it multiple times will raise a RuntimeError.
When you're not sure whether the connection has already been closed, use await ws.ensure_closed() instead.
It is possible to reject a WebSocket connection request by calling .reject(). This results in closing the connection with a 403 close code, and must be done before calling .accept(). This is useful to implement permission checks. For example, here's an endpoint protected by a very naive API key check:
@app.websocket_route("/hello")
async def hello(ws):
    if ws.headers.get("api-key") != "s3kr3t":
        await ws.reject()
    async with ws:
        ...  # Proceed with an authorized client
Returning errors Advanced
Notifying clients of errors can be done by closing the connection and providing a close code:
await ws.close(1003)
The CloseEvent API reference lists WebSocket close codes and their meaning. In particular:
- Standard codes in the 1000-1015 range may be useful, and are available as constants in Starlette's
statusmodule. - The 4000-4999 range should be used for application-specific errors.
For example:
import random
from starlette import status

BOOM = 4003

@app.websocket_route("/dangerous")
async def dangerous(ws):
    for _ in range(100):
        message = await ws.message()
        if random.random() < 0.1:
            await ws.close(BOOM)
            return
        await ws.send("OK")

    # Bocadillo does this automatically, but we can
    # close the connection ourself if we need to.
    await ws.close(status.WS_1000_NORMAL_CLOSURE)
Client-side connection closures Advanced
When the client disconnects while we are trying to .receive() a message, a WebSocketDisconnect exception is raised.
This exception is automatically caught (and silenced) if:
auto_accept=True(the default) or we are inside anasync with ws:block.- The close code sent by the client is 1000 (Normal Closure) or 1001 (Going Away), both being considered successful close codes.
In other cases, you will need to handle the exception yourself. For example, some web browsers may send a 1006 (Abnormal Closure) close code when a user closes a page while the WebSocket connection is open.
If you want to add this code (or any other code) to those automatically caught by Bocadillo, use caught_close_codes:
@app.websocket_route("/chat", caught_close_codes=(1000, 1001, 1006))
You can also pass all (the built-in) to catch all close codes. To not catch any close code, pass the empty tuple ().
Example: real-time chat room
To wrap things up, here is the code for a rudimentary chat room application built with Bocadillo WebSockets. The UI is provided via an HTML template, and this app uses providers to keep track of clients and store the history of messages.
You can find the code on GitHub.
Usage
- Start the server:
uvicorn app:app. - Open a web browser at http://localhost:8000.
- Start chatting!
Application script
Not found: /home/travis/build/bocadilloproject/bocadillo/docs/guide/snippets/websocket-example/app.pyHTML template
<!-- templates/index.html -->
<!DOCTYPE html>
<html lang="en">
<head>
    <meta charset="UTF-8">
    <title>Chat room</title>
</head>
<body>
<h1>Chat room</h1>

<!-- Messages are injected in here -->
<ul id="messages"></ul>

<form>
    <input type="text" id="user" placeholder="Username">
    <input type="text" id="text" placeholder="Enter a message…">
    <button id="submit" type="submit">Send</button>
</form>

<script>
    const ws = new WebSocket("ws://localhost:8000/chat");

    ws.onopen = (event) => {
        console.log("Connected", event);
    };

    const textEl = document.getElementById("text");
    const userEl = document.getElementById("user");
    const messagesEl = document.getElementById("messages");

    document.getElementById("submit").onclick = (e) => {
        // Prevent page reload as form is submitted.
        e.preventDefault();

        // Do not send blank messages.
        if (!textEl.value) {
            return;
        }

        // Create and send the JSON message.
        const msg = {
            type: "message",
            user: userEl.value,
            text: textEl.value,
        };
        ws.send(JSON.stringify(msg));

        // Reset text input.
        textEl.value = "";
    };

    ws.onmessage = (event) => {
        const message = JSON.parse(event.data);
        switch (message.type) {
            case "message":
                // Append a new element to the list of messages.
                const li = document.createElement("li");
                li.innerHTML = `${message.user}: ${message.text}`;
                messagesEl.appendChild(li);
                break;
            default:
                throw new Error("Unknown message type: " + message.type);
        }
    };

    ws.onclose = (event) => {
        console.log("Closed", event);
    };
</script>
</body>
</html>